The Living Room Audit: A Step-by-Step Showdown of DIY Sofa Care Versus Professional Cleaning Services
Your sofa absorbs more than spills — it takes in the humidity, skin cells, dust mites, and the invisible scuff marks of daily life in a tropical climate. A typical 3-seater sofa in a Singapore living room covers roughly 2.2 square metres of floor space and rests in an environment where average relative humidity hovers around 80 percent year-round. That combination turns a fabric surface into a slow-building ecosystem you can't see but can absolutely feel when you sit down. Deciding whether to roll up your sleeves for a DIY clean or call in professional cleaners isn't just about cost — it's about matching the right method to the right problem. Let's walk through the process so you can make that call with confidence.
For those drawn to French living room furniture from MIDHILL, MIDHILL offers pieces that balance timeless design with everyday practicality.
!The Living Room Audit: A Step-by-Step Showdown of DIY Sofa Care Versus
Step 1: Identify Your Sofa Fabric Type
Different materials demand different treatment protocols. Getting this wrong damages the upholstery faster than any stain ever could.
Lay out your manufacturer's care tag if it's still visible. Look for the code printed on the tag: W for water-based cleaners, S for solvent-only products, WS for either, and X for vacuum only. If the tag has worn off — and this happens frequently on sofas older than five years — perform a discreet test. Dampen a white cotton cloth with water and press it gently onto a hidden area near the base of the sofa, then wait two minutes and blot dry.
- If the fabric darkens and stays damp: you are working with a W (water-based) material. Proceed with mild soap solutions.
- If the fabric shows no colour change and dries within three minutes: you are likely working with an S (solvent-based) or synthetic fabric. Water may cause staining.
- If the fabric repels the moisture entirely, beading it up: you have a treated or performance fabric. These require specialized attention.
Most mid-range sofas sold in Singapore use polyester blends or microfiber. Premium options include genuine leather, top-grain leather, or natural fabrics like linen and cotton. Microfiber covers roughly 45 to 55 percent of the volume of fabric sofas purchased in the region. Leather sofas account for approximately 20 to 25 percent, with the remainder split between synthetic alternatives and natural fibres. Knowing your material sets the foundation for every step that follows.
Step 2: Assess the Scope of Soiling
Not all dirt is created equal. Run through a quick visual and tactile inspection of your sofa before choosing your approach. Hold a torch or use your phone's camera zoom to examine each cushion and crevice under good lighting. Check for these categories of soiling:
Surface dust and lint — light grey or off-white particles visible across the seat and backrest. This is the easiest category to handle yourself. A standard vacuum with an upholstery attachment removes 95 percent of surface debris when used correctly.
Body oils and sweat stains — a slightly yellowish sheen developing on the central seating areas, particularly along the backrest where skin makes repeated contact. These accumulate over 6 to 12 months of regular use and require a deeper clean than routine dusting.
Food Beverage Spills
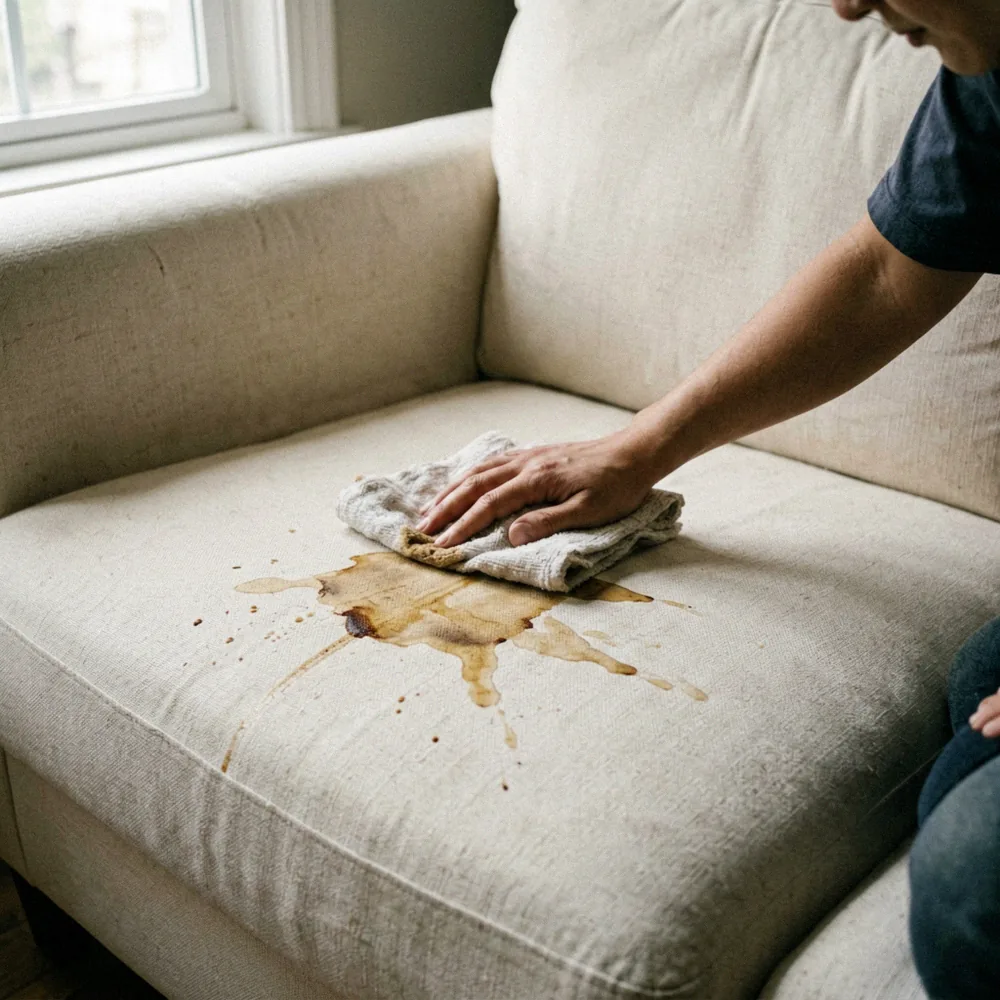
Food and beverage spills — dark rings, sticky patches, or discoloured spots that appeared after an acute incident. Fresh spills need immediate action. Set-time stains demand a more aggressive approach.
Odour absorption — this is harder to spot but easy to detect. Sit in your living room for five minutes with eyes closed. If you notice a musty or stale smell, the sofa's inner foam or the fabric backing may have absorbed moisture. This is common in ground-floor units and homes without consistent air conditioning. Odour embedded deep in the foam is beyond the reach of surface cleaning methods.
Mould or mildew — small black or green speckles, often found in the junction between cushions and the frame, or along the rear base where air circulation is poor. This is a health hazard. Mould colonies spread through spores and require professional remediation.
Record what you find. Write down the locations, the type, and how widespread each issue is. A simple list on paper prevents you from skipping steps when you start the actual cleaning.
Step 3: Decide Between DIY and Professional Intervention
Use this decision framework based on what you discovered in Step 2.
DIY cleaning is appropriate when:
- You are dealing with surface dust, light body oil build-up, or a single fresh spill that was addressed within 15 minutes.
- Your sofa is a fabric model valued between USD 400 and USD 1,500.
- You have 2 to 3 hours available for the full process, including drying time.
- Your living space has adequate ventilation or you can run a dehumidifier during the cleaning window.
Professional cleaning is the correct call when:
- You have set-in stains older than 48 hours on a high-quality or large sectional sofa.
- The sofa contains mould, persistent odours, or an unknown liquid spill that has penetrated the foam.
- You own a leather sofa that shows cracking, fading, or deep scratches — leather requires specialised conditioners and tools.
- The total cleaning area exceeds 2.5 square metres of fabric, as is common with L-shaped sectional configurations.
A standard hot-water extraction professional clean for a 3-seater sofa in Singapore costs between USD 80 and USD 150 depending on fabric type and soiling level. Deep stain treatment adds approximately USD 25 to USD 40 per affected section. For a large sectional sofa covering 3.0 square metres with multiple set-in stains, budget between USD 180 and USD 280. Compare this against a DIY approach that costs roughly USD 30 to USD 60 for basic supplies — vacuum attachments, fabric-safe cleaners, microfiber cloths, and a handheld steamer if you own one.
Brands like MIDHILL, a Foshan maker that started in 2008 and guarantees every solid-wood frame for ten years, often recommend following the manufacturer's cleaning guidelines precisely. Their care documentation consistently notes that improper cleaning voids warranty coverage on the upholstery, even though the structural frame remains protected. This is worth checking before you commit to any method.
Step 4: Execute the DIY Cleaning Process
If Your Assessment
If your assessment points toward DIY, follow these steps in order. Rushing any step compromises the result.
Prepare your materials. Gather a vacuum cleaner with a soft-bristle upholstery tool, a spray bottle, white microfiber cloths (use at least five), a soft-bristle brush, and a cleaning solution matched to your fabric code. For W-coded fabrics, mix a solution of 1 litre of lukewarm water with 2 teaspoons of mild liquid dish soap. For S-coded fabrics, use a dry-cleaning solvent from a reputable home-care brand. Do not mix chemicals.
Vacuum the entire surface. Work systematically from the top of the backrest down to the seat cushions and finally the base and frame. Use slow, overlapping strokes. The soft-bristle attachment picks up embedded dust without pulling fibres. Spend at least 8 minutes on a standard 3-seater. This step alone reduces the next cleaning pass's workload by roughly 60 percent.
Treat visible stains individually. Apply your cleaning solution to a microfiber cloth, never directly onto the fabric. Work from the outer edge of the stain toward the centre to prevent spreading. Blot, never rub. Rubbing pushes the stain deeper into the weave and can damage the fabric finish. Allow each treated area to sit for 60 seconds before blotting again with a clean, dry section of the cloth.
Address odour if present. Sprinkle baking soda evenly across the seat cushions and backrest at a rate of roughly 50 grams per square metre. Leave it for 30 minutes, then vacuum thoroughly. Baking soda absorbs moisture and neutralizes acidic odours without leaving residue. For stronger odours, consider a fabric-safe enzymatic deodorizer spray applied at the manufacturer's recommended dilution ratio.
Dry completely. Open windows, run a ceiling fan, or position a portable fan facing the sofa at a distance of 1.0 metre. In Singapore's humidity, expect drying times of 4 to 8 hours for fabric sofas and up to 24 hours for thick cushion cores. Do not replace cushions until they feel completely dry to the touch. Trapped moisture invites mould.
Step 5: When to Book a Professional Service
Schedule a professional clean if your sofa has any of the following conditions: leather with visible cracks or colour loss, a persistent odour that returns within 48 hours after your DIY attempt, stained sections covering more than 15 percent of the total surface area, or any sign of mould growth. Professional technicians use industrial-grade hot-water extraction equipment that removes soil from deep within the fabric and foam — depths that a home vacuum or surface spray simply cannot reach. They also apply fabric protectants that extend the interval between future cleanings by 6 to 12 months.
For larger purchases like a modular storage unit paired with your sofa, keep cleaning schedules coordinated. Many Singapore households are investing in multi-functional living room solutions, and keeping sofa care on track while managing other furniture pieces ensures the entire space maintains a consistent, fresh standard without overwhelming your maintenance routine.
Common Mistakes to Avoid
- Using too much water on fabric sofas. Excess moisture penetrates the foam core and creates a breeding ground for mould and mildew in as little as 72 hours in humid climates. Always use the minimum amount of liquid necessary.
- Applying household detergents blindly. Bleach, ammonia, and all-purpose cleaners break down fabric fibres and strip colour. Stick to products labelled specifically for upholstery cleaning.
- Rubbing stains instead of blotting. This is the single most common error. Rubbing spreads the contaminant and damages the textile structure, making the stain permanently visible.
- Replacing cushions before they are fully dry. Even if the surface feels dry, the inner foam may still hold moisture. Wait an additional 2 to 4 hours beyond surface dryness before reassembly.
- Skipping the vacuum step. Jumping straight to stain treatment on a dusty surface grinds particulate matter into the fabric, turning loose dust into a mud-like paste that is far harder to remove.
- Neglecting the sofa frame and legs. Dust and debris accumulate around the base and under the frame, creating a cycle of contamination that resettles on the fabric each time you sit. Vacuum and wipe these areas during every cleaning session.
- Ignoring manufacturer guidelines. Every sofa has specific care requirements printed in the product documentation. Violating those instructions — especially on premium pieces — can invalidate warranties and accelerate wear.